|
|
Post by bixaorellana on Jul 27, 2010 16:01:09 GMT
NOTE: This thread is for this particular picture manager, so that people can learn about it and ask questions. If you use a different picture manager and are willing to share your skill, please start a new thread using the subject heading format above -- Photo editors: [name of program]. ===================================================================================== Here is a thread for learning about Microsoft Office Picture Manager, hereinafter known as MOPM. To find out if you have MOPM on your computer: Start > All Programs > Microsoft Office > Microsoft Office Tools > Microsoft Office Picture Manager. To open a picture on your computer in MOPM, right-click on the chosen photo, go to "open with", and select Microsoft Office Picture Manager. (If you decide you like MOPM, you can set it as your default picture manager.) Here is how that looks:  The side bar of options as shown in the picture will not be visible when MOPM first opens with a picture. To get that, click on Edit Pictures in the top bar. The first thing you might want to do with a photo is to click on Auto Correct in the top bar. Sometimes it makes a picture just right, sometimes it makes it too bright. Either way, it gives you an idea of how to proceed. Note: anything you do can be undone right up until the time you hit Save (in File, upper left corner). Don't like a fix? Use Cntrl + Z for "undo".
|
|
|
|
Post by bixaorellana on Jul 27, 2010 16:03:33 GMT
A good starter tweak is Brightness and Contrast. Click on that to see Brightness; Contrast, and Midtone: adjust midtones only. You can click on 'more' next to Midtone for a few more options. Try Contrast first. Ease it up just a little to see if it doesn't make your photo a little crisper. Then go up or down with Midtone to adjust brightness. Midtone seems to affect the overall crispness and color better than Brightness, but definitely experiment with Brightness as well. Another great tool is Rotate and Flip. The most obvious use is for photos that display sideways on the screen. However, it's extremely useful for straightening up photos as well. Here is a photo that was too crooked to use. I straightened it, but left the white border that thus occurs around it: However, if you have enough extraneous stuff around your subject, you might opt to crop out the white portion. That brings us to the Crop tool, one of the reasons I like MOPM so much. It's dead easy to use, as you can see what you're doing. Here is a picture on the screen after Crop has been clicked. See the little brackets on all four corners & the lines on either side? Simply drag those back and forth with your mouse to cut out anything you don't want.  |
|
|
|
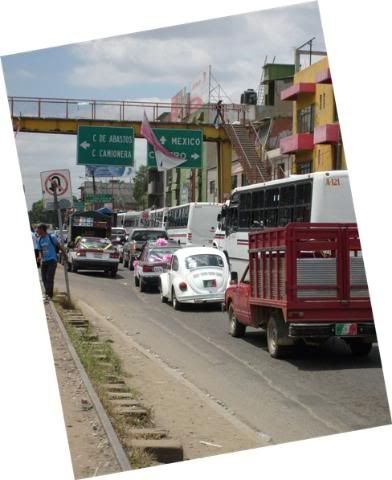
Post by bixaorellana on Jul 27, 2010 16:05:55 GMT
So now that we have that very indifferent picture displayed, lets go through some steps to see how it can be improved. I tried Auto Correct first, and it made for an improvement. Still, I felt it made the bright areas too bright. So instead I edged Contrast up until the texture of the wall was more obvious. Then I lowered Midtone to get that adobe color to come out. I dropped brightness just the tiniest bit so the sunny areas wouldn't be so glary. I gave Color Saturation a couple of ticks, more for enhanced contrast than for color. Then it was time to crop. I definitely wanted to get rid of the plastic bottles and that upper right section is too glary. Once I cropped out the bottles, that black thing on the ground tugged at my peripheral vision, so out it came. I teased the croppers back and forth, utilizing Undo as necessary, until I got something that I thought was acceptable. Now for resizing. There are a couple of ways you can go with this. Almost all pictures that come off a digital camera will be huge. Even after cropping, my picture is 1473 pixels wide x 1784 high. If you look at the very first shot in the OP, you'll see a percentage window. At the moment, the picture I'm working on says 34%. I can use the Resize feature and put 34 into the percentage slot provided. That will give me a photo that doesn't take up nearly as much space on the computer and is much better for emailing. The other option is simply to use Resize and fill in Custom Width and Height. On AnyPort, the maximum proportions without the forum resizer kicking in are 800 wide x 700 high. Well, I don't want this photo to be that big. Since it's now higher than it is wide, I think I'd like it to be 500 pixels high. The resize slots help me find what the proper proportion of width will be. Thus, I'm setting it to 413 wide x 500 high. The last step is to save it: File (upper left corner) Save -- and that's it! Now, say you want to keep the original intact. Instead of Save, select Save As, then give it a name. You'll have your original and the new version both. Here is the final version:  One last note before you all go off to experiment. You might have one "raw" picture with various details you'd like to crop to and save as individual pictures. In order to have enough originals to work on, use Export in MOPM: File > Export ----- then fill in the slots that will appear. You can make as many Exports as you need. |
|